在我们创建节点的时候,我们有时候需要把部分网站的访问IP分配到不同的路由。在X-ui面板上,我们是可以直接操作的。这篇教程就来和大家一起聊聊如何在X-ui设置分流规则,实现一个节点访问不同网站按需分流到不同的IP
准备材料
- 一台VPS、并已经安装X-ui和设置节点
部署步骤
- 打开你的X-ui管理面板
- 转到面板设置→xray相关设置
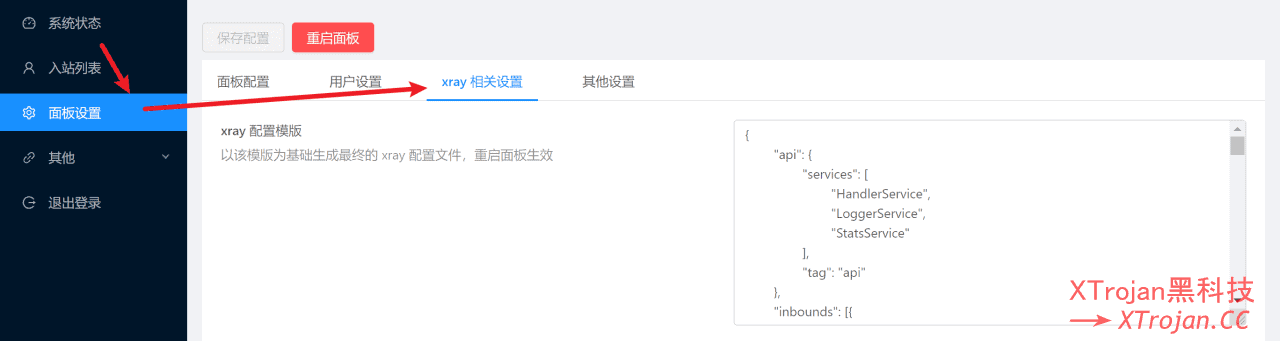
- 以下为xray的配置模板,大家可以按照注释的内容配置xray
warp linux client 配置模板
{
	"api": {
		"services": [
			"HandlerService",
			"LoggerService",
			"StatsService"
		],
		"tag": "api"
	},
	"inbounds": [{
		"listen": "127.0.0.1",
		"port": 62789,
		"protocol": "dokodemo-door",
		"settings": {
			"address": "127.0.0.1"
		},
		"tag": "api"
	}],
	"outbounds": [{
			"tag": "IP4-out",
			"protocol": "freedom",
			"settings": {}
		},
		{
			"tag": "IP6-out",
			"protocol": "freedom",
			"settings": {
				"domainStrategy": "UseIPv6"
			}
		},
		{
			"tag": "socks5-warp",
			"protocol": "socks",
			"settings": {
				"servers": [{
					"address": "127.0.0.1",
					"port": 40000 //warp socks5端口
				}]
			}
		}
	],
	"policy": {
		"system": {
			"statsInboundDownlink": true,
			"statsInboundUplink": true
		}
	},
	"routing": {
		"rules": [{
				"type": "field",
				"outboundTag": "IP6-out",
				"domain": ["ipget.net"] //自定义域名走IPv6出口,例:["geosite:netflix","geosite:*****"]或["netflix.com","****.**"]
			},
			{
				"type": "field",
				"outboundTag": "socks5-warp",
				"domain": ["geosite:google"] //自定义域名走socks5 warp出口,例:["geosite:netflix","geosite:*****"]或["netflix.com","****.**"]
			},
			{
				"type": "field",
				"outboundTag": "IP4-out",
				"network": "udp,tcp" //除上述规则外,其他连接走IPv4出口
			},
			{
				"inboundTag": [
					"api"
				],
				"outboundTag": "api",
				"type": "field"
			},
			{
				"ip": [
					"geoip:private"
				],
				"outboundTag": "blocked",
				"type": "field"
			},
			{
				"outboundTag": "blocked",
				"protocol": [
					"bittorrent"
				],
				"type": "field"
			}
		]
	},
	"stats": {}
}
IPv4+IPv6配置模板
{
	"api": {
		"services": [
			"HandlerService",
			"LoggerService",
			"StatsService"
		],
		"tag": "api"
	},
	"inbounds": [{
		"listen": "127.0.0.1",
		"port": 62789,
		"protocol": "dokodemo-door",
		"settings": {
			"address": "127.0.0.1"
		},
		"tag": "api"
	}],
	"outbounds": [{
			"tag": "IP4-out",
			"protocol": "freedom",
			"settings": {}
		},
		{
			"tag": "IP6-out",
			"protocol": "freedom",
			"settings": {
				"domainStrategy": "UseIPv6"
			}
		}
	],
	"policy": {
		"system": {
			"statsInboundDownlink": true,
			"statsInboundUplink": true
		}
	},
	"routing": {
		"rules": [{
				"type": "field",
				"outboundTag": "IP6-out",
				"domain": ["ipget.net"] //自定义域名走IPv6出口,例:["geosite:netflix","geosite:*****"]或["netflix.com","****.**"]
			},
			{
				"type": "field",
				"outboundTag": "IP4-out",
				"network": "udp,tcp" //除上述规则外,其他连接走IPv4出口
			},
			{
				"inboundTag": [
					"api"
				],
				"outboundTag": "api",
				"type": "field"
			},
			{
				"ip": [
					"geoip:private"
				],
				"outboundTag": "blocked",
				"type": "field"
			},
			{
				"outboundTag": "blocked",
				"protocol": [
					"bittorrent"
				],
				"type": "field"
			}
		]
	},
	"stats": {}
}
PS: Geosite支持列表可以看这里
- 重启面板
- 检查节点分流效果

关于Wire guard分流
首先需要x-ui内核用XRAY1.6.5,相关说明在https://github.com/XTLS/Xray-core/releases?page=2
https://xtls.github.io/document/level-2/warp.html
参照视频教程,需要提取wireguard warp的私钥和IPV6对端地址,类似下面这种
    {
      "protocol": "wireguard",
      "settings": {
        "secretKey": "UN528daElGacVlhkYbi0GQtBS+u13qx92E77BKUDNHE=",
        "address": ["172.16.0.2/32", "2606:4700:110:8d34:2b80:57d:cc6c:5609/128"],
        "peers": [
          {
            "publicKey": "bmXOC+F1FxEMF9dyiK2H5/1SUtzH0JuVo51h2wPfgyo=",
            "AllowedIPs": ["0.0.0.0/0", "::/0"],
            "endpoint": "162.159.193.10:2408"
          }
        ],
        "reserved":[0, 0, 0]
      },
      "tag": "wireguard-1"
    },
然后增加出站规则,类似下面这样
            {
                "type": "field",
                "domain": [
                    "geosite:cn","ipw.cn","ip.sb"
                ],
                "outboundTag": "wireguard-1"
            },
            {
                "type": "field",
                "ip": [
                    "geoip:cn"
                ],
                "outboundTag": "wireguard-1"
            },

